Building a sauna at home is a fantastic way to enjoy the benefits of relaxation and detoxification without having to leave the comfort of your own space. Whether you have a spare room, a backyard, or even a small corner, creating your own sauna can be a rewarding and cost-effective project.
In this guide, we will explore the step-by-step process of building a sauna at home, including choosing the right location, selecting the appropriate materials, and installing the necessary equipment. From traditional wood-burning saunas to modern infrared options, this introduction will provide you with the essential knowledge to embark on your own sauna-building journey.
Table of Contents
- Benefits of Having a Sauna at Home
- Consider Using a Pre-Built Sauna
- Pre-Sauna Building Considerations
- Building a DIY Sauna
- Post-Sauna Building Steps
- Maintenance & Care of Home Sauna
- FAQs
- Conclusion
Benefits of Having a Sauna at Home
Having a sauna at home offers numerous benefits for both physical and mental well-being.
- Firstly, it aids in relaxation and stress reduction by promoting the release of endorphins, which help improve mood and alleviate anxiety.
- Regular sauna sessions also enhance blood circulation, leading to improved cardiovascular health and detoxification through increased sweating.
- The heat and steam from a sauna can also help relieve muscle tension and joint pain, providing relief for individuals with arthritis or muscle soreness.
- Furthermore, having a sauna at home saves time and money spent on spa visits, allowing for convenient and frequent use, and resulting in long-term health benefits.
Consider Using a Pre-Built Sauna
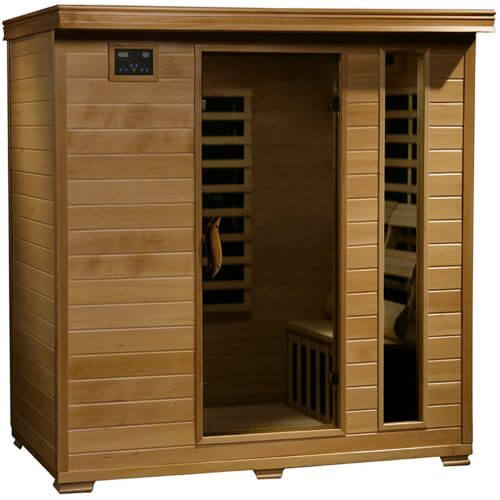
Installing a pre-built sauna offers numerous benefits compared to building one from scratch.
- Firstly, it saves time and effort as the sauna kit comes with pre-cut, pre-measured, and pre-assembled components, eliminating the need for extensive planning and construction.
- Additionally, pre-built saunas are designed by professionals, ensuring optimal functionality, safety, and efficiency. These saunas often include advanced features like digital controls, lighting, and audio systems, enhancing the overall sauna experience.
- Moreover, pre-built saunas are portable and can be easily relocated if needed. Lastly, they come with warranties, providing peace of mind and protection against any manufacturing defects.
- Overall, installing a pre-built sauna offers convenience, quality, and customization options at a reasonable cost.
You might want to check the following pre-built saunas:
Pre-Sauna Building Considerations
i. Different Types of Saunas
When considering building a sauna at home, it is essential to understand the different types available. The most common types include traditional saunas, infrared saunas, and steam saunas. Traditional saunas use heated rocks to produce dry heat, while infrared saunas use infrared heaters to directly heat the body. Steam saunas, on the other hand, produce moist heat by pouring water onto heated rocks. Each type has its own unique benefits and considerations, so it is important to research and choose the one that suits your needs and preferences.
ii. Different Types of Sauna Heaters
Choosing the right sauna heater is crucial for creating the desired sauna experience. The most common types of sauna heaters include electric, wood-burning, and gas. Electric heaters are the most popular choice for home saunas due to their convenience and ease of use. Wood-burning heaters provide a more traditional and authentic sauna experience but require more maintenance and careful monitoring. Gas heaters offer a quick heat-up time and efficient operation, but they may not be suitable for all home setups. Consider your preferences, budget, and available resources when selecting a sauna heater.
iii. Choosing the Right Location in Your Home
Selecting the ideal location for your home sauna is essential for maximizing its benefits and ensuring a comfortable experience. Consider factors such as available space, accessibility, and proximity to water and electrical connections. Basements, spare rooms, or even outdoor spaces can be suitable options. When choosing the location, also keep in mind the potential impact of heat and moisture on surrounding materials and structures.
iv. Sauna Materials
The choice of materials for your sauna can greatly impact its aesthetics, durability, and overall experience. Wood is the most common material used for saunas, with cedar and hemlock being popular choices due to their resistance to heat and moisture. Other materials to consider include benches, flooring, and insulation. Opt for materials that are comfortable, easy to clean, and resistant to the high temperatures and humidity levels typically found in saunas.
v. Ventilation & Insulation
Proper ventilation and insulation are crucial for maintaining a safe and comfortable sauna environment. Adequate ventilation helps remove excess moisture and ensure fresh air circulation, while insulation helps retain heat and energy efficiency. Consider installing vents or windows that can be opened to regulate the temperature and humidity levels. Additionally, ensure that your sauna is properly insulated to prevent heat from escaping and to reduce energy consumption.
vi. Safety Considerations, Tools, & Electrical Requirements
Safety should be a top priority when building a sauna at home. Ensure that you have the necessary tools and equipment to install and maintain your sauna, such as a thermometer, hygrometer, and sauna stones. It is also important to comply with electrical requirements and hire a professional electrician to ensure proper wiring and grounding. Install safety features such as emergency shut-off switches and temperature controls to prevent accidents and ensure a safe sauna experience.
Building a sauna at home requires careful consideration of various factors. Understanding the different types of saunas, selecting the right sauna heater, choosing the appropriate location, and using suitable materials are all essential steps. Additionally, proper ventilation, insulation, and safety measures should be taken into account to create a comfortable and safe sauna environment. By considering these factors, you can build a sauna that meets your needs and provides a relaxing and rejuvenating experience in the comfort of your own home.
Also read: How to Use a Sauna (What To Do Before, During & After)
Building a DIY Sauna
A sauna is a great way to relax and unwind after a long day or week. It’s also a great way to improve your health and well-being. Building a sauna from scratch can seem overwhelming, but with the right tools and materials, it’s a project that can be completed in a weekend. This step-by-step guide will take you through the process of building a DIY sauna.
Step 1: Choose a Location
The first step in building a sauna is to choose a location. You will need a space that is large enough to accommodate the sauna, as well as any additional features you may want, such as a changing room or shower. Ideally, the location should be near a water source, such as a bathroom or outdoor hose.
Step 2: Gather Materials
Once you have chosen a location, it’s time to gather materials. You will need:
– Cedar or other sauna-grade wood for the walls and benches
– Insulation for the walls and ceiling
– A sauna heater
– Rocks for the heater
– Sauna door
– Thermometer and hygrometer
– Sauna light
– Ventilation system
– Nails, screws, and other hardware
Step 3: Build the Frame
The next step is to build the frame for the sauna. Start by measuring the space and cutting the wood to the appropriate lengths. Use nails or screws to attach the wood together, creating a frame for the walls and ceiling. Be sure to leave space for the door and any windows or vents.
Step 4: Install Insulation
Once the frame is in place, it’s time to install insulation. This will help keep the sauna warm and prevent heat from escaping. Cut the insulation to fit between the studs and attach it with staples or adhesive.
Step 5: Install the Walls & Ceiling
Once the insulation is in place, it’s time to install the walls and ceiling. Use sauna-grade wood for this step, as it is designed to withstand the high temperatures and humidity of a sauna. Attach the wood to the frame with nails or screws, making sure to leave space for the door and any windows or vents.
Step 6: Install the Heater & Rocks
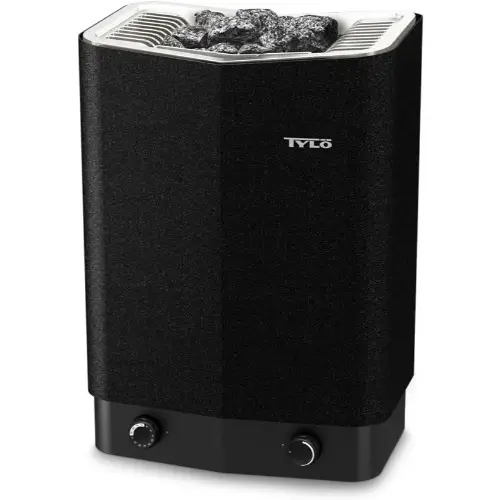
The next step is to install the sauna heater and rocks. Follow the manufacturer’s instructions for installation, making sure to place the rocks on top of the heater. The rocks will absorb and distribute the heat, creating a consistent temperature throughout the sauna.
Step 7: Install the Door, Thermometer, & Hygrometer
Once the heater is installed, it’s time to install the door, thermometer, and hygrometer. The door should be made of sauna-grade wood and should fit snugly in the frame. The thermometer and hygrometer should be placed in a visible location so you can monitor the temperature and humidity levels.
Step 8: Install the Light & Ventilation System
The final step is to install the sauna light and ventilation system. The light should be placed in a location that provides adequate lighting without being too bright. The ventilation system should be designed to circulate the air and prevent the buildup of moisture.
Step 9: Enjoy Your Sauna
Once everything is installed, it’s time to enjoy your sauna. Start by preheating the sauna for at least 30 minutes before use. Once it’s heated, add water to the rocks to create steam and increase the humidity. Relax and enjoy the benefits of your DIY sauna.
Building a DIY sauna is a great way to improve your health and well-being. With the right tools and materials, it’s a project that can be completed in a weekend. Follow these steps to create your own sauna and enjoy the benefits for years to come.
Post-Sauna Building Steps
i. Sauna Accessories
Once you have built your sauna, it is important to invest in some essential sauna accessories to enhance your overall experience. A thermometer is crucial to monitor the temperature inside the sauna and ensure it remains at a comfortable level. A hygrometer measures the humidity in the sauna, helping you maintain the ideal moisture level. A timer is handy for setting the duration of your sauna session, ensuring you don’t overstay and risk dehydration. Lighting is also important to create a soothing ambiance inside the sauna, allowing you to relax and unwind in a calming environment.
ii. Relaxation Methods
To fully enjoy your sauna experience, consider incorporating relaxation methods. Music can be a great way to create a tranquil atmosphere. Choose soothing melodies or nature sounds to help you unwind and let go of stress. Aromatherapy is another fantastic option to enhance relaxation. Essential oils such as lavender or eucalyptus can be added to water and poured over the sauna rocks, releasing a pleasant fragrance that promotes relaxation and rejuvenation.
You can also use Himalayan salt to help promote better breathing, improved blood circulation, and deeper relaxation.
iii. Tips For Creating a Safe Sauna Environment
Safety should always be a top priority when using a sauna. Here are some tips to ensure a safe sauna experience. Firstly, always drink plenty of water before and after your sauna session to stay hydrated. It is also advisable to limit your sauna sessions to 15-20 minutes to prevent overheating. If you have any health concerns or medical conditions, consult with a healthcare professional before using the sauna. Additionally, make sure the sauna is well-ventilated to prevent suffocation and avoid using any flammable materials inside. Lastly, always listen to your body and exit the sauna if you feel lightheaded or dizzy.
Once you have built a sauna, it is important to consider the accessories that will enhance your experience. Investing in a thermometer, hygrometer, timer, and lighting will ensure you have a comfortable and enjoyable sauna session. Additionally, incorporating relaxation methods such as music and aromatherapy can further enhance your relaxation. Lastly, prioritizing safety is crucial when using a sauna. Following these tips will help create a safe and enjoyable sauna environment for you and your loved ones.
Maintenance & Care of Home Sauna
i. Instructions for Cleaning & Maintaining Your Sauna
To ensure your home sauna remains in top condition, regular cleaning and maintenance is essential. Start by wiping down the interior and exterior surfaces with a mild detergent and warm water. Avoid using abrasive cleaners or harsh chemicals, as they may damage the wood or other materials. Additionally, make sure to clean the sauna benches, flooring, and walls to remove any sweat or dirt buildup. It is also important to clean the sauna rocks and heater regularly. Follow the manufacturer’s instructions for cleaning the rocks and replace them if they become cracked or damaged. Lastly, don’t forget to clean the sauna’s ventilation system to maintain proper airflow and prevent mold or mildew growth.
ii. Regular Inspections & Repairs
Regular inspections are crucial for identifying any potential issues with your home sauna. Check the sauna’s electrical connections, including the heater and lights, to ensure they are functioning properly and there are no loose wires. Inspect the sauna door for any gaps or leaks that could affect the heat and humidity levels. Additionally, examine the sauna’s wood for any signs of wear or damage, such as cracks or warping. It is important to address these issues promptly to prevent further damage and ensure the safety of users. If you are unsure about how to conduct inspections or make repairs, it is recommended to consult a professional sauna technician.
iii. Tips for Extending the Lifespan of Your Sauna
To prolong the lifespan of your home sauna, there are a few key tips to keep in mind. Firstly, avoid excessive heat and humidity fluctuations, as these can cause the wood to expand and contract, leading to cracks or warping. It is also important to use a sauna timer to prevent excessive heating and to avoid leaving the sauna running for extended periods. Regularly oiling or treating the sauna wood with a suitable product can help maintain its integrity and prevent drying or cracking. Finally, encourage sauna users to shower before entering the sauna to minimize the amount of sweat and oils that come into contact with the wood, which can lead to discoloration and deterioration over time.
Also read: How to clean a sauna suit (Best Guide)
By following these instructions for cleaning and maintaining your sauna, conducting regular inspections, and implementing tips to extend its lifespan, you can ensure that your home sauna remains a relaxing and enjoyable retreat for years to come.
FAQs
How to use a sauna?
To use a sauna, first, enter the sauna and sit on a towel to protect the bench. Relax and enjoy the heat, but be mindful of your body’s limits. Stay hydrated by drinking water and take breaks if needed. Afterward, cool down gradually and replenish fluids to rehydrate. Learn more.
Can you use your car as a sauna during summer?
No, using your car as a sauna during summer is extremely dangerous. Cars can quickly reach high temperatures, posing severe health risks like heatstroke or even death. Saunas are designed with proper ventilation and temperature controls, which a car lacks, making it an unsafe option.
Conclusion
In conclusion, building a sauna at home can be a rewarding and enjoyable project for those seeking relaxation and wellness benefits. By following the necessary steps and considering important factors such as location, materials, and ventilation, individuals can create a personalized sauna space that suits their needs. Whether it’s a traditional steam sauna or an infrared sauna, the process requires careful planning and attention to detail. However, with the right resources and guidance, constructing a sauna at home can be a cost-effective alternative to visiting commercial saunas. Ultimately, the effort put into building a sauna will be well worth it, as it provides a convenient and rejuvenating retreat within the comfort of one’s own home.
